GliCID Portal CLAM create account
| Clam is an authentication portal that is constantly evolving. We will update the documentation but it is possible that at some point the screenshots/functionality will not be quite the same |
1. Create a GliCID account
-
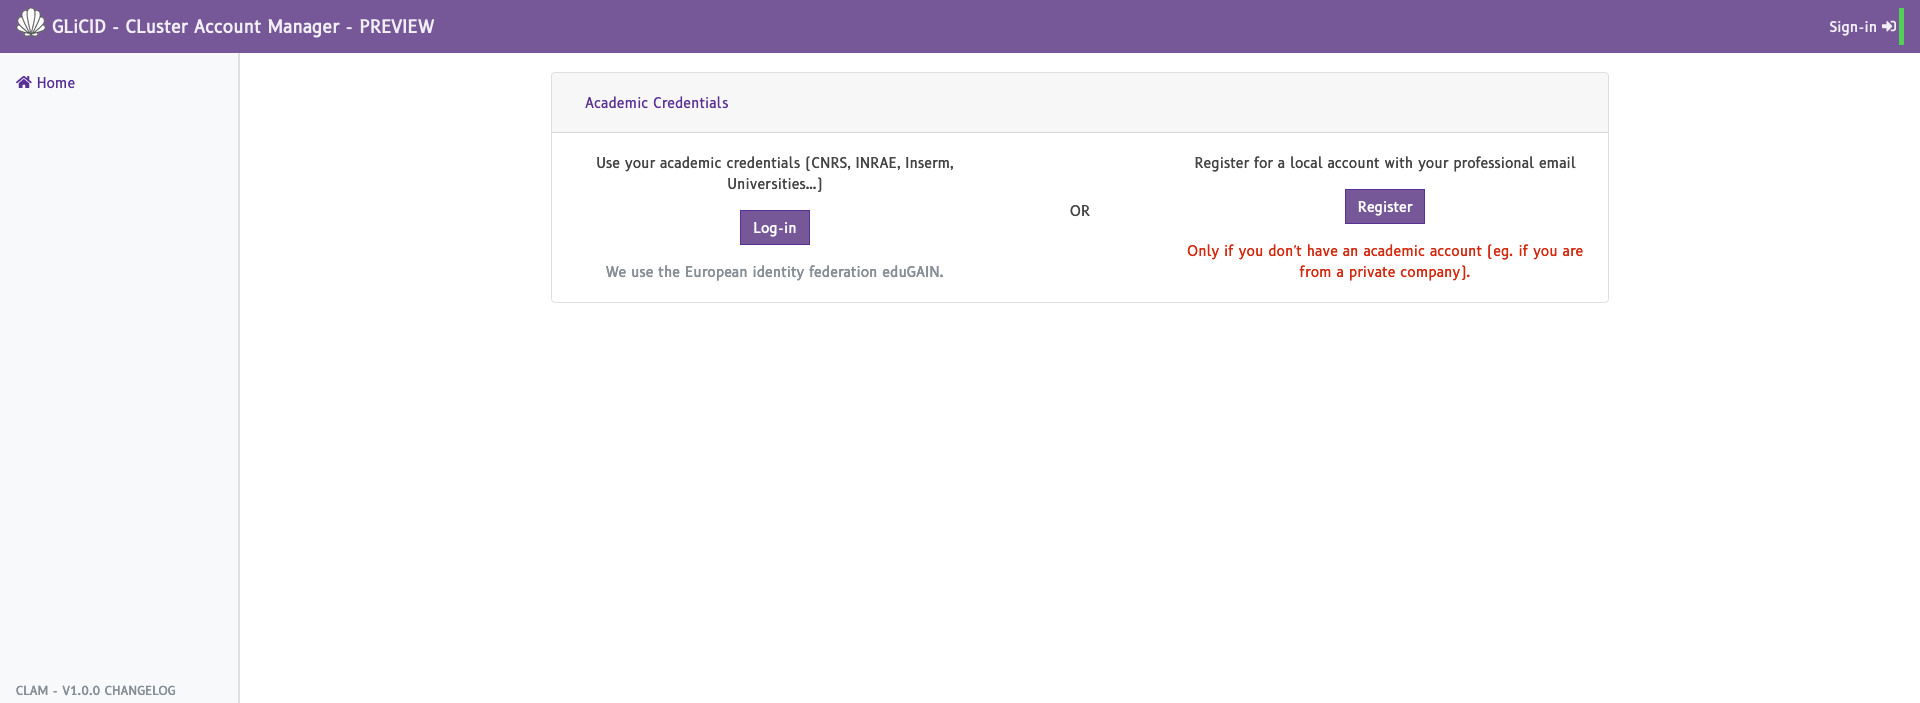
Go to the GLiCID account manager login page: clam.glicid.fr/auth/login and click on the Log-in button.
-
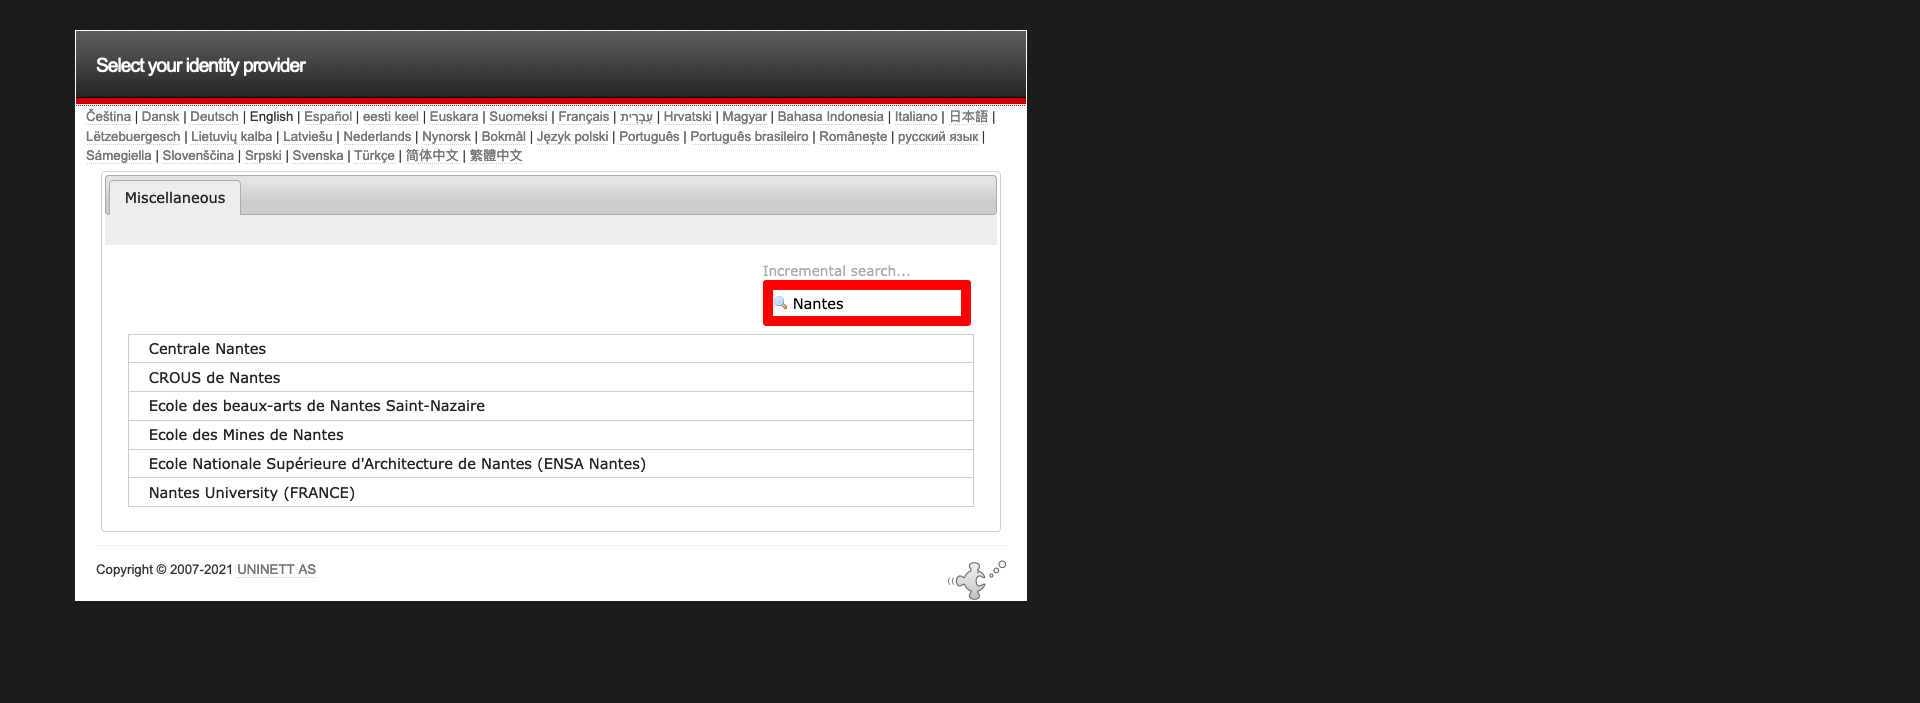
Use the search box on the top left to find your institute in the list (if you don’t find your institute in the list, please contact us).
-
You should be redirected to your institute log-in page to enter your institute credentials. This step is required to get your identity from a trusted source (i.e. your institute).

-
Then, you should have a list of fields that are needed to create a GLiCID account. Your password is not one of them.

-
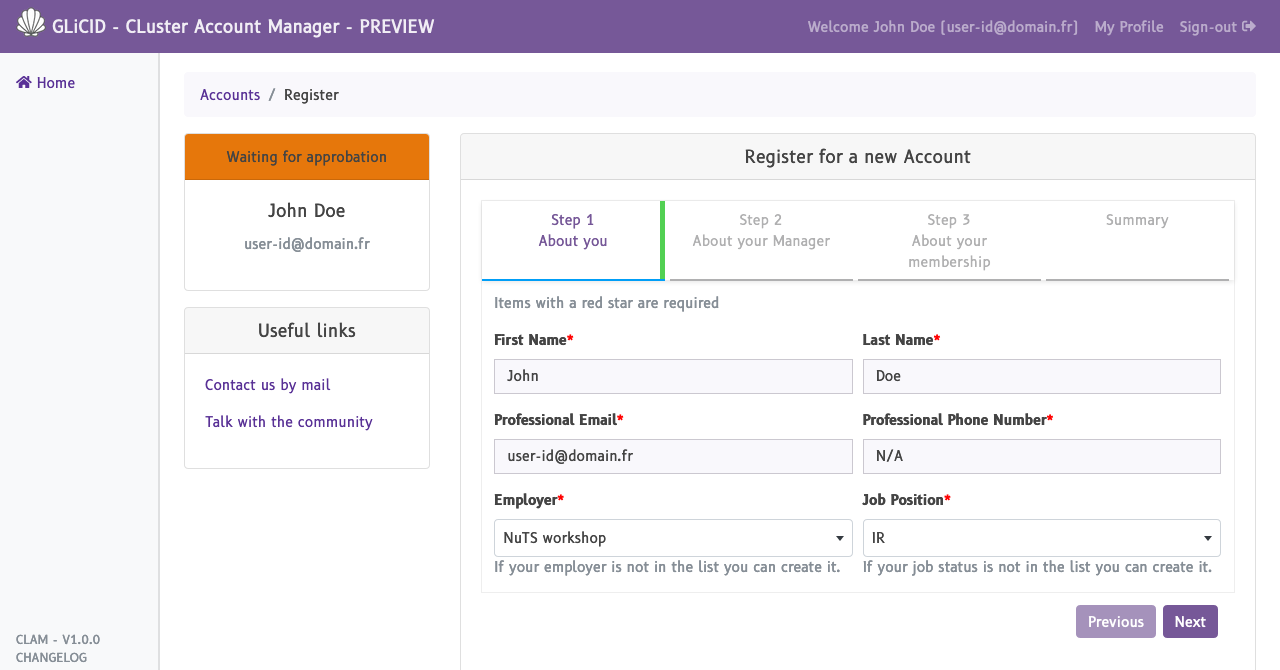
You will be redirected to GLiCID account registration page where your name and email address are already prefilled. You only need to add fill some mandatory forms information. Then click next. (For example):
-
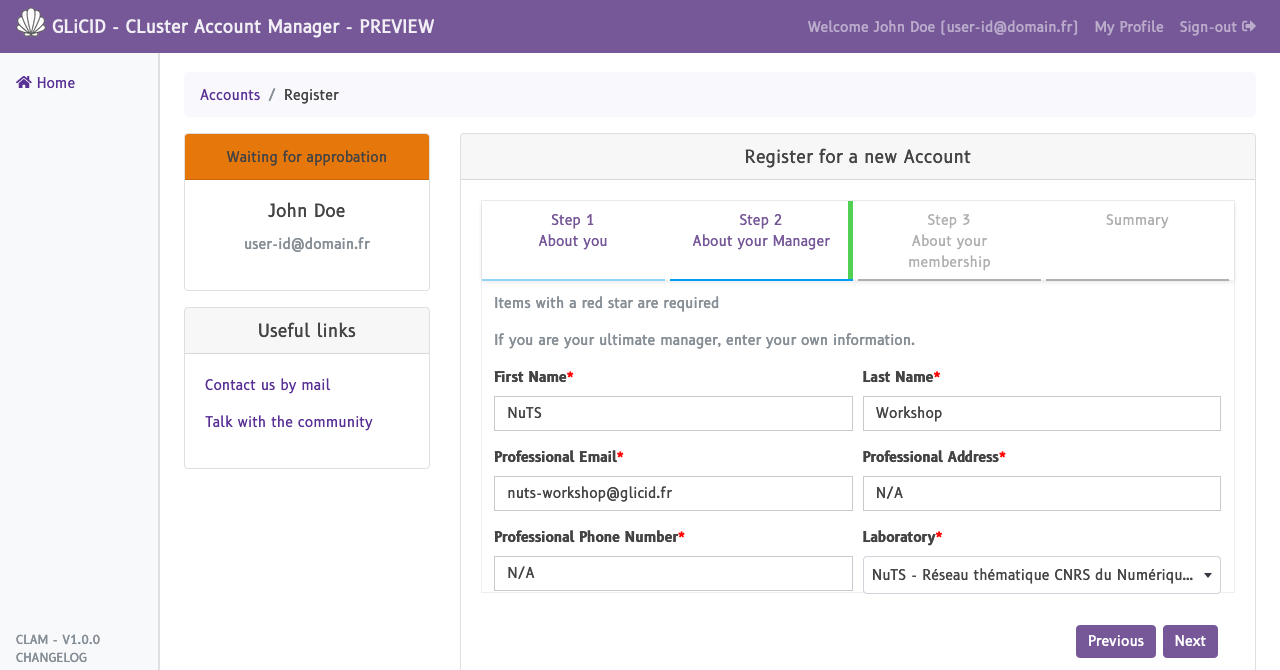
The next page is supposed to be about your manager information to activate your account. Here, you should provide dummy information like in the image. Then click next.
-
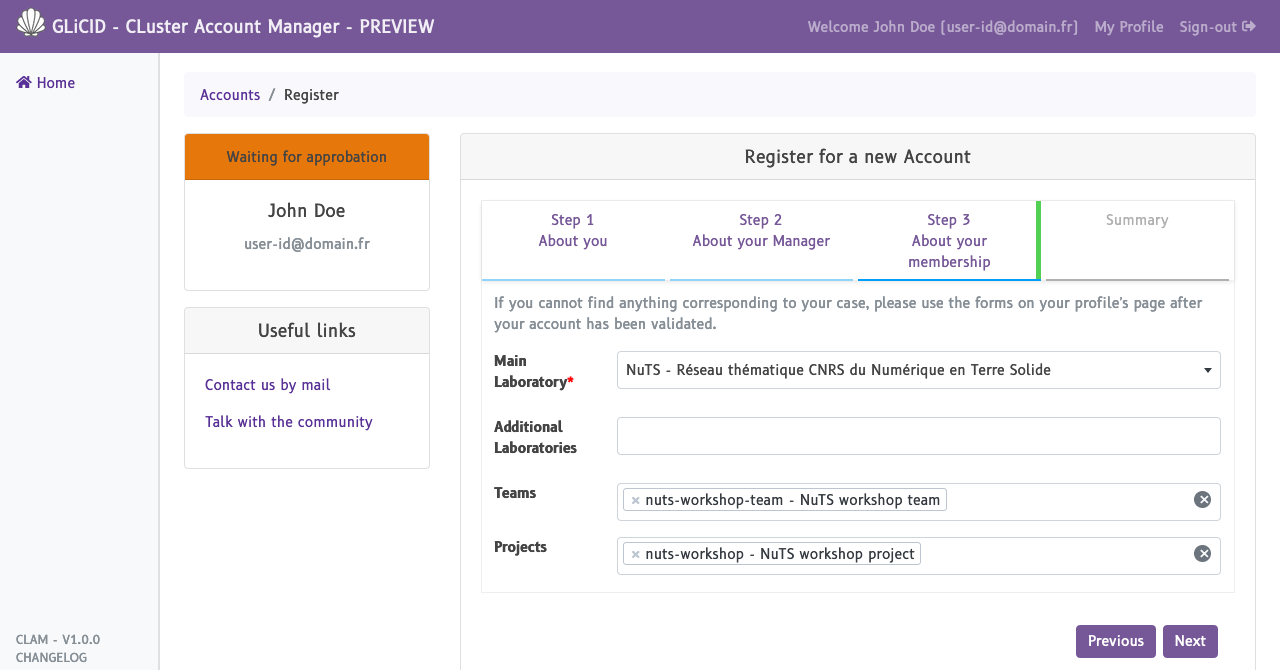
Select your Laboratory field, add your Teams when they exist and your Projects when they exist . Then click next.
-
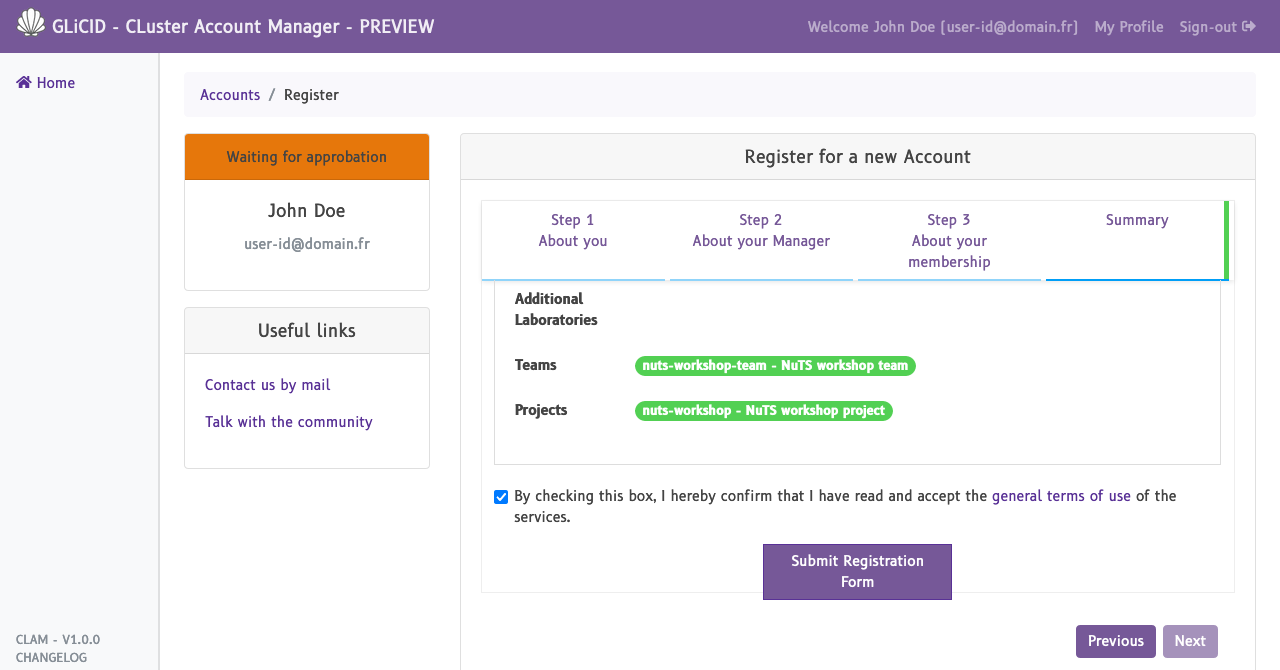
Review the form, scroll to the bottom and check the general terms of use and submit the registration form.
-
You should get an email to confirm that your registration request was taken into account. You can ignore its content.
-
At this stage we need to validate your account manually.
-
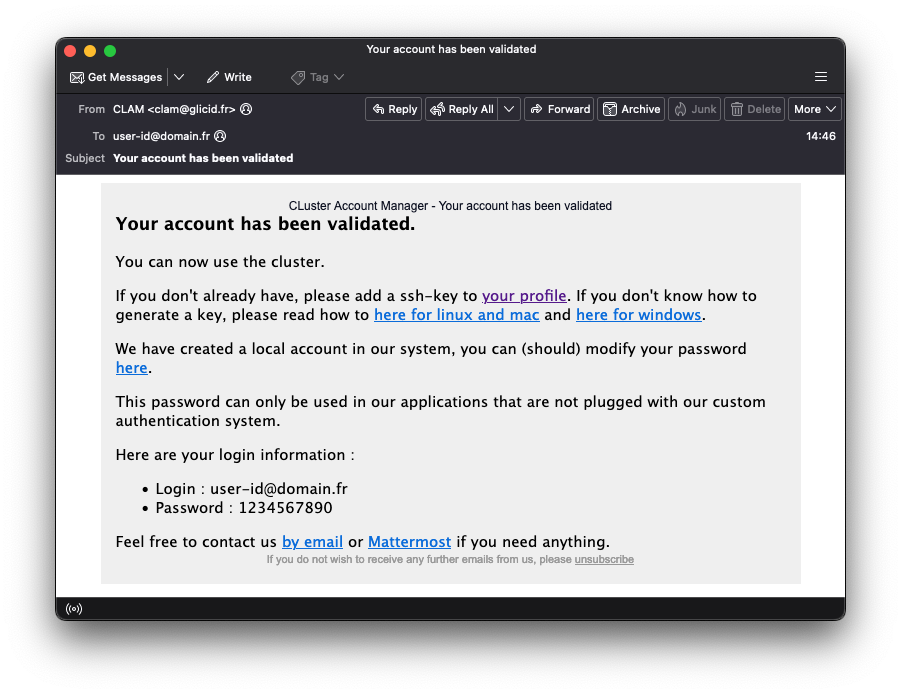
When its done, you will receive a second email saying that your account has be validated. The only two relevant information are: your GLiCID login and a randomly generated password. Please, keep this password (you may need it to authenticate on glicid tools (like the helpdesk for example). You need to generate a ssh key now.
-
Now, you can copy/paste your ssh public key in the form and make your ssh configuration like is it explain in the bottom form
